# Docker + Kubernetes
> Discover Docker and Kubernetes integration on Mac, enabling easy deployment and management of containerized applications.
- Canonical: https://www.russ.cloud/2018/01/06/docker-kubernetes/
- Published: 2018-01-06
- Author: Russ McKendrick
- Tags: Docker, Kubernetes, macOS
---
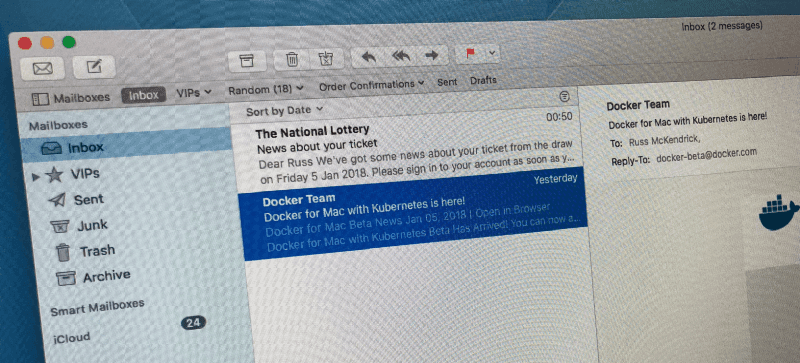
This morning, like a lot of the Docker community, I receieved an email I had been waiting for since November, confirmation that Kubernetes on Docker for Mac had made its way through to a public edge release.
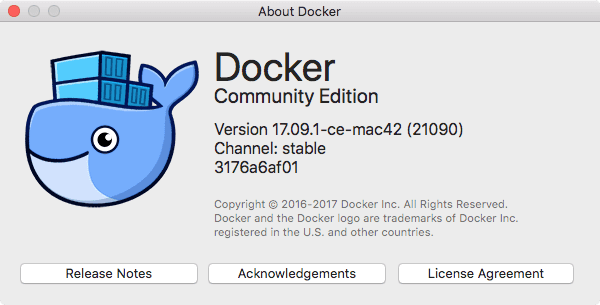
 The version of Docker I was running was on the stable channel;
 The first thing I did was open up the preferences;
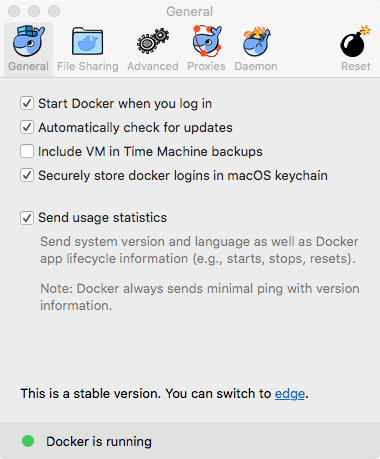 and used the [switch to edge link](https://docs.docker.com/docker-for-mac/install/) in there to go straight to the Docker for Mac download page;
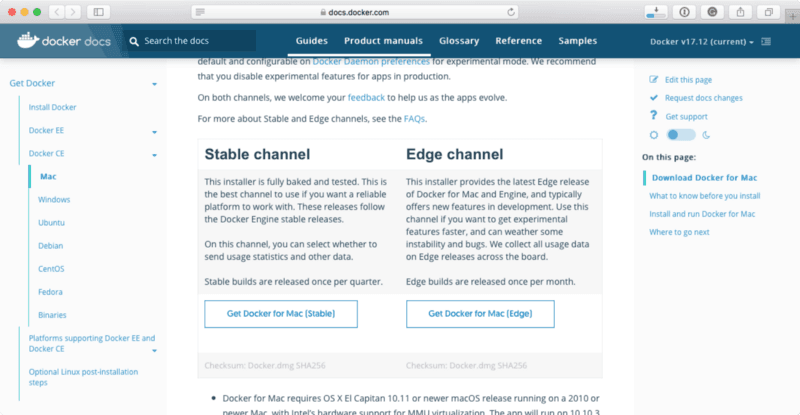 Once there, I clicked on the **Get Docker for Mac (Edge)** button which went onto download the latest disk image, once downloaded I double clicked it and was presented with the drag & drop installer;
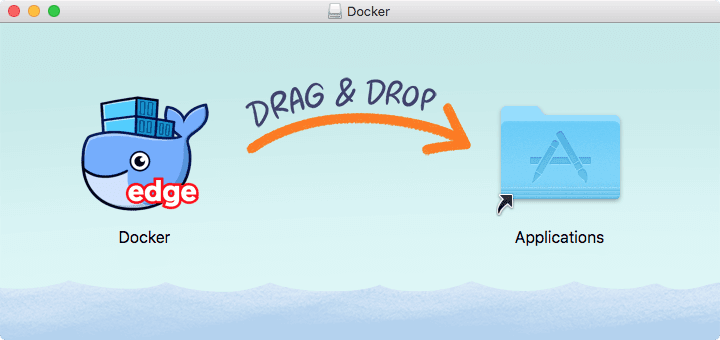 I quit Docker, and dragged the Docker application to my Applications folder. Once it had copied across I reopened Docker which gave me the following warning;
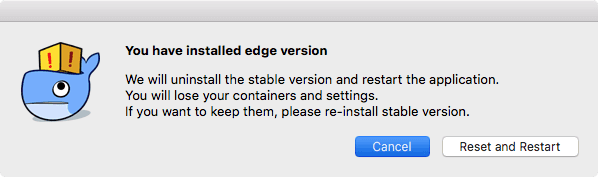 I was fine with that, so clicked on **Reset and Restart**, to be able to do this Docker needed my password;
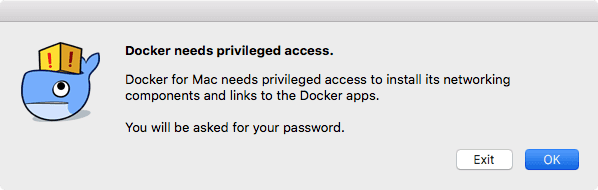 After a few minutes, Docker for Mac started up, the first thing I did was open the About Docker window to confirm the version;
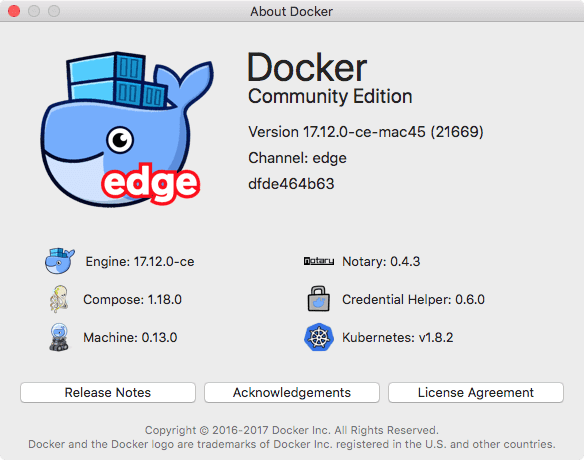 As you can see, this window now shows the version numbers of all of the Docker components installed and available. What we are insterested in is Kubernetes v.1.8.2. I also checked the version on the command line using the Docker client ;
```bash frame="terminal" title="Docker + Kubernetes 1/14"
$ docker version
$ docker-compose version
$ docker-machine version
```
As you can see, this window now shows the version numbers of all of the Docker components installed and available. What we are insterested in is Kubernetes v.1.8.2. I also checked the version on the command line using the Docker client ;
```bash frame="terminal" title="Docker + Kubernetes 1/14"
$ docker version
$ docker-compose version
$ docker-machine version
```
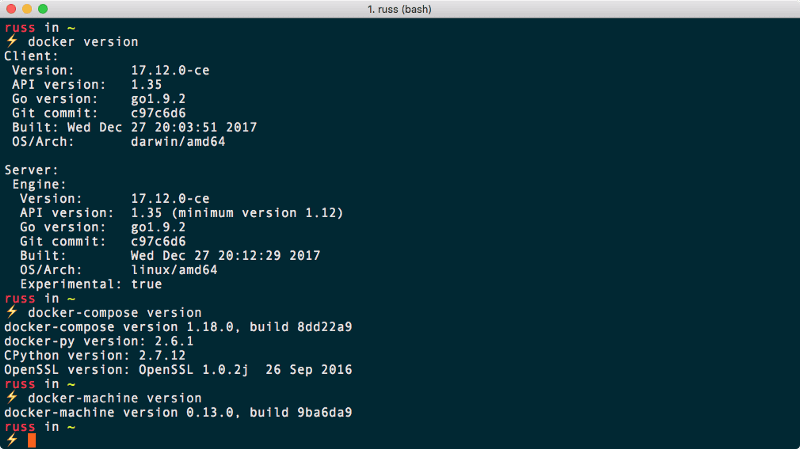 As you can see from the results above, everything matched. So lets take a look at Kubernetes, which by default is disabled.
To enable Kubernetes open the preferences and click on the Kubernetes icon;
As you can see from the results above, everything matched. So lets take a look at Kubernetes, which by default is disabled.
To enable Kubernetes open the preferences and click on the Kubernetes icon;
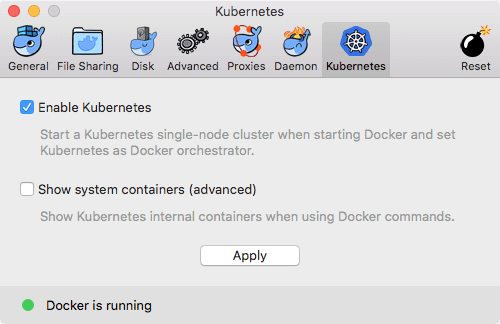 Once in there tick **Enable Kubernetes** and then click on the **Apply** button;
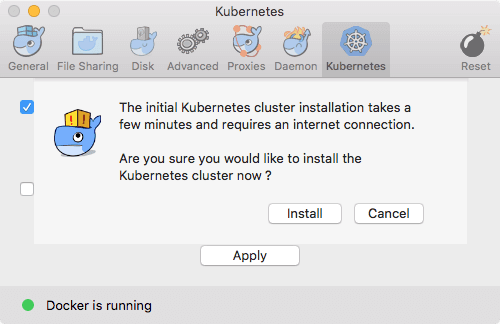 This will present you with a message informing you that Docker will need a few minutes to install and configure the cluster, as well as an internet connection so it can download the compoents.
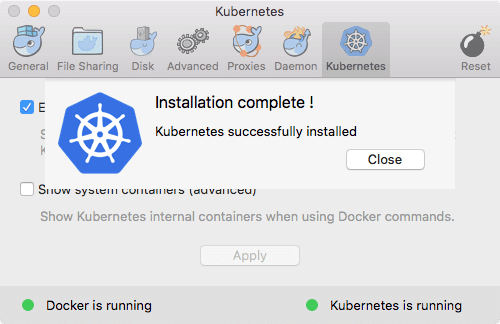
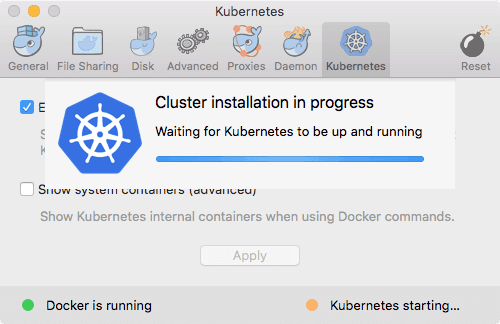 After a few minutes you should see the following message;
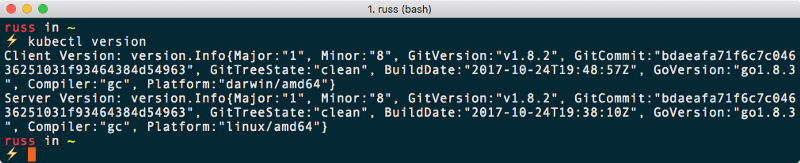
 Docker for Mac also installs the Kubernetes command line client, kubectl, you can check this is installed by running;
```bash frame="terminal" title="Docker + Kubernetes 2/14"
$ kubectl version
```
Docker for Mac also installs the Kubernetes command line client, kubectl, you can check this is installed by running;
```bash frame="terminal" title="Docker + Kubernetes 2/14"
$ kubectl version
```
 Running the following command will give you information about the nodes running in your Kubernetes cluster, we should see just the one;
```bash frame="terminal" title="Docker + Kubernetes 3/14"
$ kubectl get nodes
```
Running the following command will give you information about the nodes running in your Kubernetes cluster, we should see just the one;
```bash frame="terminal" title="Docker + Kubernetes 3/14"
$ kubectl get nodes
```
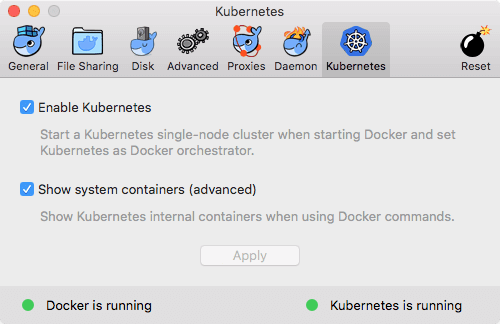
 Now that we have a single node cluster up and running lets dig a little deeper into how Docker have done their deployment. You may remember in the Kubernetes preferences pane there is an option which allows you to **Show system containers**, tick this and click **Apply**;
 Running the following command will list of the running containers, but only show the container name, image used and the command which was executed;
```bash frame="terminal" title="Docker + Kubernetes 4/14"
$ docker container ls --format "table`{{.Names}}`\t`{{.Image }}`\t`{{.Command}}`"
```
You can see the results below;
Running the following command will list of the running containers, but only show the container name, image used and the command which was executed;
```bash frame="terminal" title="Docker + Kubernetes 4/14"
$ docker container ls --format "table`{{.Names}}`\t`{{.Image }}`\t`{{.Command}}`"
```
You can see the results below;
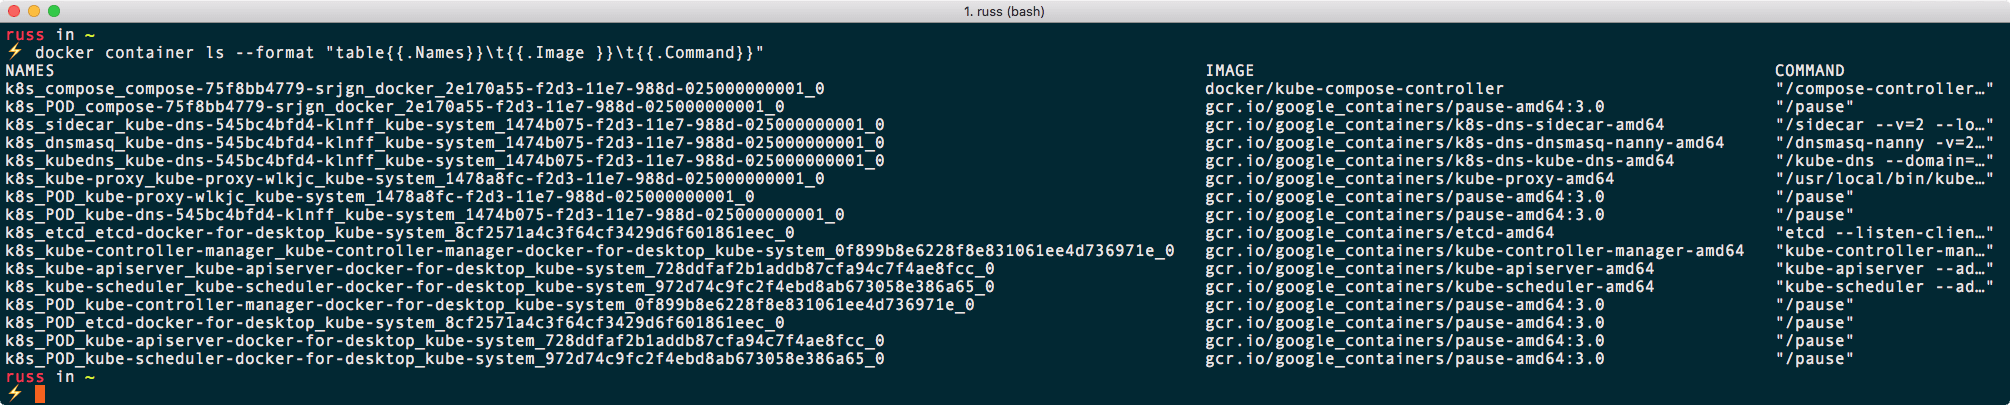 One thing to note is that only one of the container images is from Docker themselves, the rest are from Google. You can find out more information on how these images are built at the following page;
[kubernetes/kubernetes](https://github.com/kubernetes/kubernetes/tree/master/build "https://github.com/kubernetes/kubernetes/tree/master/build")
We can find out a little more on the installation itself by running the following commands;
```bash frame="terminal" title="Docker + Kubernetes 5/14"
$ kubectl get namespaces
$ kubectl get pods --namespace kube-system
```
As you can see from the terminal output below, this lists all of the pods which containers below belong to;
One thing to note is that only one of the container images is from Docker themselves, the rest are from Google. You can find out more information on how these images are built at the following page;
[kubernetes/kubernetes](https://github.com/kubernetes/kubernetes/tree/master/build "https://github.com/kubernetes/kubernetes/tree/master/build")
We can find out a little more on the installation itself by running the following commands;
```bash frame="terminal" title="Docker + Kubernetes 5/14"
$ kubectl get namespaces
$ kubectl get pods --namespace kube-system
```
As you can see from the terminal output below, this lists all of the pods which containers below belong to;
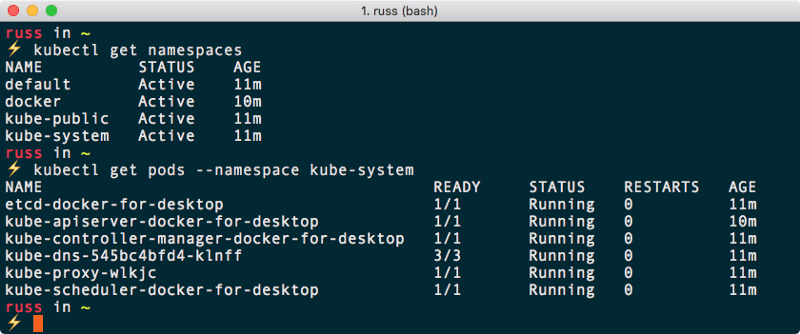 The one service which is missing is the Kubernetes Dashboard, this would be a good excuse to install it.
Installing the Dashboard is quite a simple task, running the following command will deploy it your Kubernetes cluster;
```bash frame="terminal" title="Docker + Kubernetes 6/14"
$ kubectl create -f https://raw.githubusercontent.com/kubernetes/dashboard/master/src/deploy/recommended/kubernetes-dashboard.yaml
```
After a minute or two you should be able to run the following commands to view the deployments and services running in the **kube-system** namespace;
```bash frame="terminal" title="Docker + Kubernetes 7/14"
$ kubectl get deployments --namespace kube-system
$ kubectl get services --namespace kube-system
```
The one service which is missing is the Kubernetes Dashboard, this would be a good excuse to install it.
Installing the Dashboard is quite a simple task, running the following command will deploy it your Kubernetes cluster;
```bash frame="terminal" title="Docker + Kubernetes 6/14"
$ kubectl create -f https://raw.githubusercontent.com/kubernetes/dashboard/master/src/deploy/recommended/kubernetes-dashboard.yaml
```
After a minute or two you should be able to run the following commands to view the deployments and services running in the **kube-system** namespace;
```bash frame="terminal" title="Docker + Kubernetes 7/14"
$ kubectl get deployments --namespace kube-system
$ kubectl get services --namespace kube-system
```
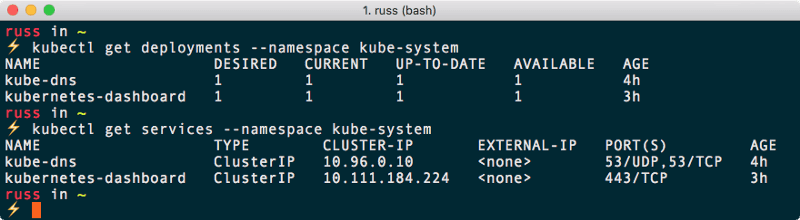 Now that the Dashboard is running you can access it through the proxy service provided by kubectl, to start this service simply run;
```bash frame="terminal" title="Docker + Kubernetes 8/14"
$ kubectl proxy
```
Now that the Dashboard is running you can access it through the proxy service provided by kubectl, to start this service simply run;
```bash frame="terminal" title="Docker + Kubernetes 8/14"
$ kubectl proxy
```
 Once the proxy has started open the following URL in your browser;
[http://localhost:8001/api/v1/namespaces/kube-system/services/https:kubernetes-dashboard:/proxy/](http://localhost:8001/api/v1/namespaces/kube-system/services/https:kubernetes-dashboard:/proxy/)
This should show you a login page;
Once the proxy has started open the following URL in your browser;
[http://localhost:8001/api/v1/namespaces/kube-system/services/https:kubernetes-dashboard:/proxy/](http://localhost:8001/api/v1/namespaces/kube-system/services/https:kubernetes-dashboard:/proxy/)
This should show you a login page;
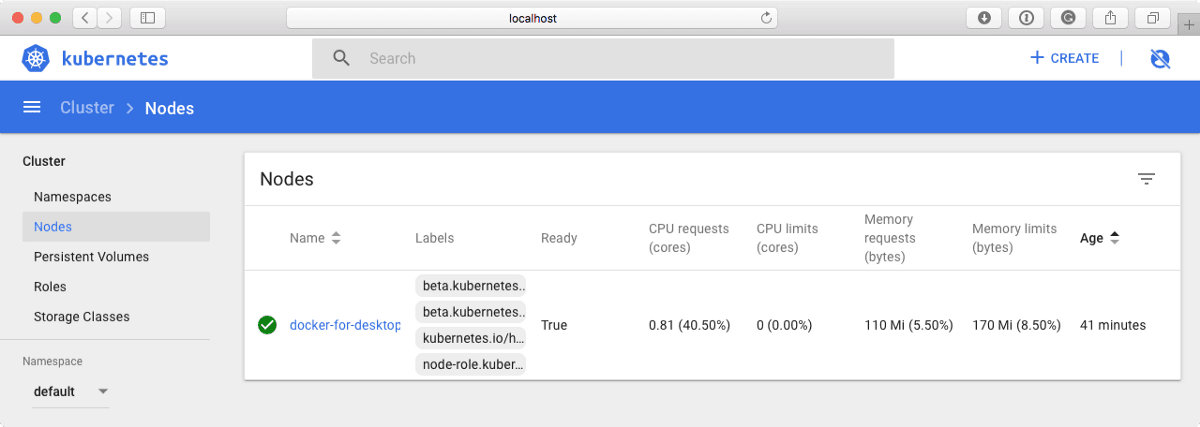
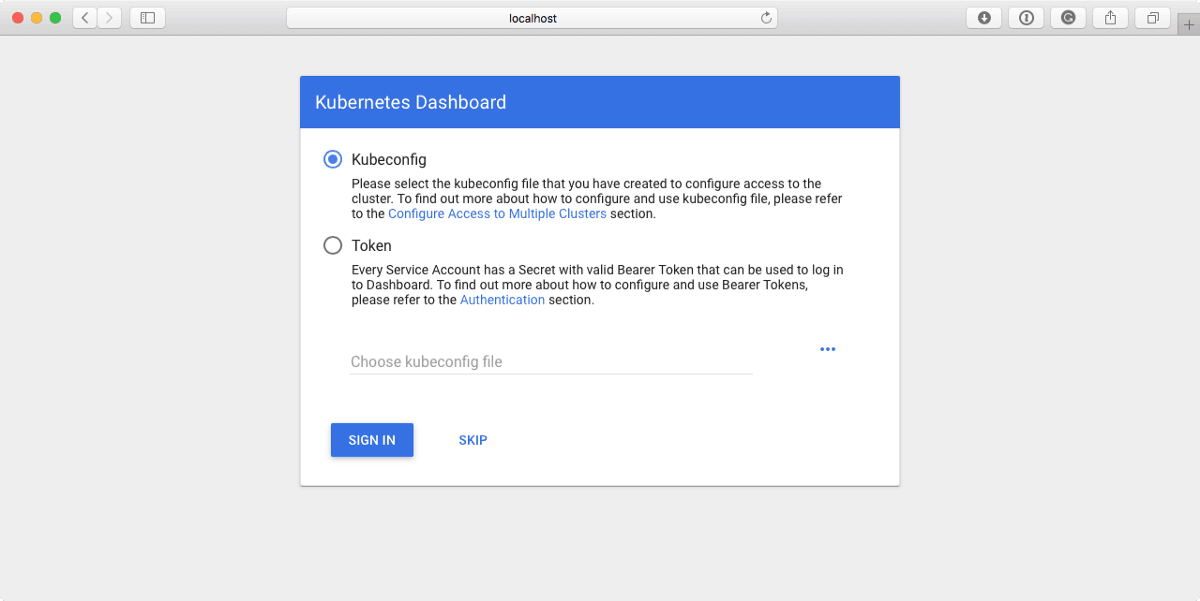 As we are connected via the proxy we do not need to sign in using either Kubeconfig or with a Token, so just press **Skip**, this will take you straight to the Dashboard;
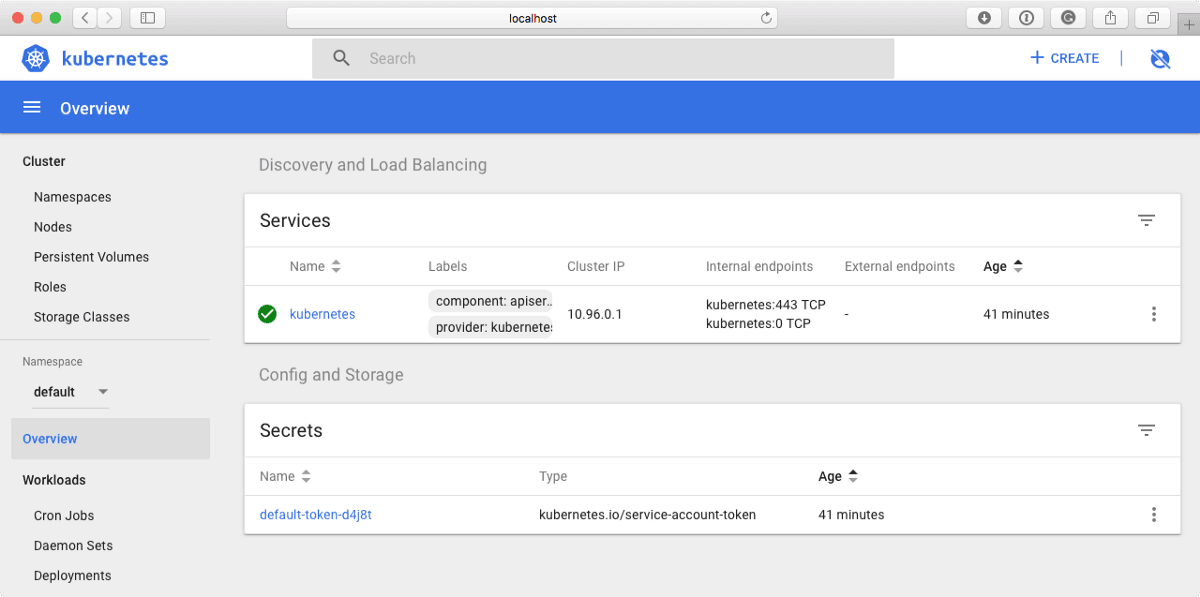
 Docker also provide an example application, lets take a look at deploying it.
The Docker Compose file, yes you read that right we are going be using Docker Compose, looks like the following;
```bash frame="terminal" title="Docker + Kubernetes 9/14"
version: '3.3'
services:
web:
build: web
cover:
image: dockerdemos/lab-web
volumes:
- "./web/static:/static"
ports:
- "80:80"
words:
build: words
cover:
image: dockerdemos/lab-words
deploy:
replicas: 5
endpoint_mode: dnsrr
resources:
limits:
memory: 16M
reservations:
memory: 16M
db:
build: db
cover:
image: dockerdemos/lab-db
```
Running the following command;
```bash frame="terminal" title="Docker + Kubernetes 10/14"
$ docker stack deploy --compose-file stack.yml demo
```
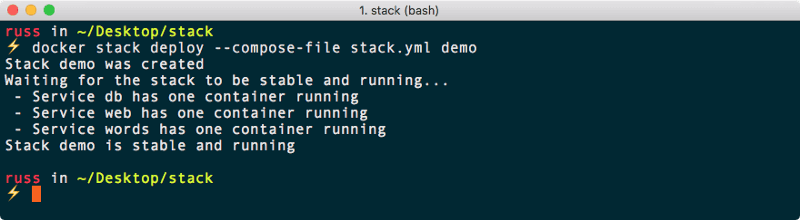
Will launch a demo application which was origininally used during European DockerCon 17.
Docker also provide an example application, lets take a look at deploying it.
The Docker Compose file, yes you read that right we are going be using Docker Compose, looks like the following;
```bash frame="terminal" title="Docker + Kubernetes 9/14"
version: '3.3'
services:
web:
build: web
cover:
image: dockerdemos/lab-web
volumes:
- "./web/static:/static"
ports:
- "80:80"
words:
build: words
cover:
image: dockerdemos/lab-words
deploy:
replicas: 5
endpoint_mode: dnsrr
resources:
limits:
memory: 16M
reservations:
memory: 16M
db:
build: db
cover:
image: dockerdemos/lab-db
```
Running the following command;
```bash frame="terminal" title="Docker + Kubernetes 10/14"
$ docker stack deploy --compose-file stack.yml demo
```
Will launch a demo application which was origininally used during European DockerCon 17.
 Once the stack is stable and running you can check run;
```bash frame="terminal" title="Docker + Kubernetes 11/14"
$ kubectl get pods
```
Once the stack is stable and running you can check run;
```bash frame="terminal" title="Docker + Kubernetes 11/14"
$ kubectl get pods
```
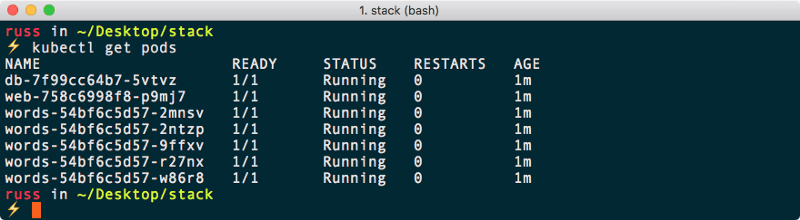 As you can see, this has launched several pods, we can also check the deployment and services by running;
```bash frame="terminal" title="Docker + Kubernetes 12/14"
$ kubectl get deployments
$ kubectl get services
```
As you can see, this has launched several pods, we can also check the deployment and services by running;
```bash frame="terminal" title="Docker + Kubernetes 12/14"
$ kubectl get deployments
$ kubectl get services
```
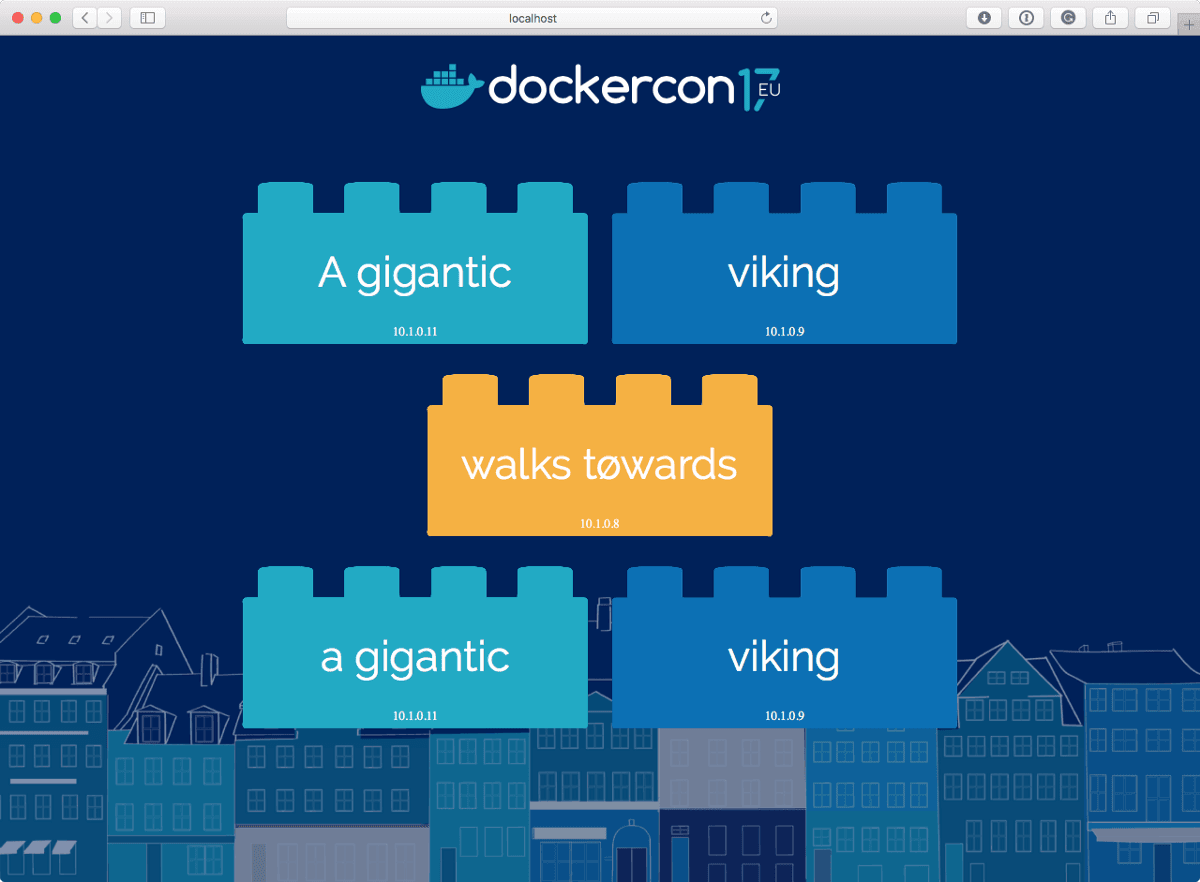
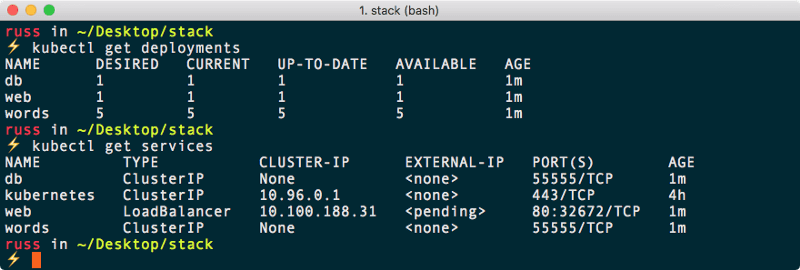 As you see, the web service has a type of **LoadBalancer**, while the Exteral-IP address is shown as `` you should be able to open your browser and go to [http://localhost/](http://localhost/) where you should be able to see the demo application;
 Running the following command will stop and remove the example service;
```bash frame="terminal" title="Docker + Kubernetes 13/14"
$ docker stack remove demo
```
If you want to remove the Kubernetes Dashboard you can run;
```bash frame="terminal" title="Docker + Kubernetes 14/14"
$ kubectl delete deployment kubernetes-dashboard --namespace kube-system
```
As you can see, Kubernetes on Docker for Mac is quite straight forward, and so far I have to say I much prefer it to running [Minikube](https://media-glass.es/launching-a-local-kubernetes-lab-using-minikube-39560f792889), having everything all in a single place really makes things straight foward.
Running the following command will stop and remove the example service;
```bash frame="terminal" title="Docker + Kubernetes 13/14"
$ docker stack remove demo
```
If you want to remove the Kubernetes Dashboard you can run;
```bash frame="terminal" title="Docker + Kubernetes 14/14"
$ kubectl delete deployment kubernetes-dashboard --namespace kube-system
```
As you can see, Kubernetes on Docker for Mac is quite straight forward, and so far I have to say I much prefer it to running [Minikube](https://media-glass.es/launching-a-local-kubernetes-lab-using-minikube-39560f792889), having everything all in a single place really makes things straight foward.