My Starship Prompt Setup
I spend alot of time in the terminal on both my home and work machines so have taken the time to get my terminal prompt looking good and I had been using PowerLine10k for a few years.
After trying to debug why my terminal was opening slowly I spotted the warning below at the top of the projects repo:
I decided it was time for a change.
Why Starship?
After some quick Googling I decided upon Starship, it is a cross-shell prompt written in Rust that’s fast, customizable, and incredibly feature-rich. Its repo boasts that unlike traditional shell prompts, Starship:
- Works across multiple shells (zsh, bash, fish, PowerShell)
- Is blazingly fast (written in Rust)
- Provides context-aware information
- Supports extensive customization through a simple TOML file
- Has minimal dependencies
That ticks a lot of boxes so I decided to give it a try.
The Design Philosophy
My prompt design follows a few key principles:
- Information density without clutter: Show relevant context without overwhelming
- Visual hierarchy: Use color and positioning to prioritize information
- Gruvbox aesthetics: Maintain a consistent retro-groove color scheme
- Left-to-right narrative: Left side shows “where I am,” right side shows “what’s happening”
- Look good: I take a lot of screen shots and do screen shares - so it needs to look good !!!
Now this is a little zoomed in, but this is what my prompt looks like:
The Color Palette: Gruvbox Dark
I’m using the Gruvbox Dark color scheme, which provides a warm, retro aesthetic that’s easy on the eyes during long coding sessions. The palette includes:
- Orange (
#d65d0e): System and user context - Yellow (
#d79921): Current directory and status - Aqua (
#689d6a): Git information - Blue (
#458588): Programming language indicators - Purple (
#b16286): Time display - Red (
#cc241d): Battery and critical indicators
The Prompt Layout
My prompt is divided into segments, connected with powerline-style arrows. Here’s the breakdown:
Left Side: Contextual Information
[os]disabled = falsestyle = "bg:color_orange fg:color_fg0"
[username]show_always = trueformat = '[ $user ]($style)'
The prompt starts with the OS icon (on macOS) and username. While some people hide the username, I keep it visible—it’s a quick visual confirmation of which system I’m on, especially when dealing with remote sessions.
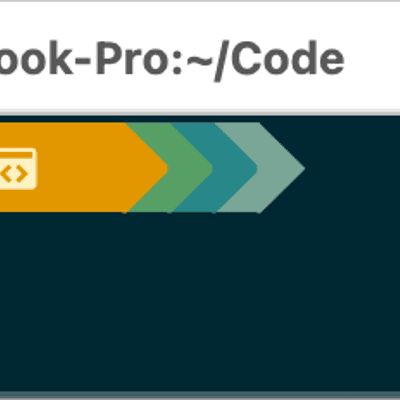
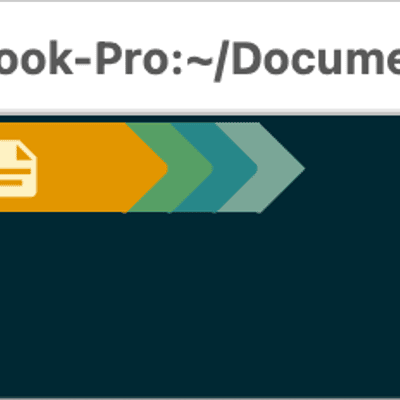
[directory]format = "[ $path ]($style)"truncation_length = 3truncation_symbol = " "truncate_to_repo = trueThe current directory is shown with intelligent truncation. If I’m in a git repository, it truncates relative to the repo root. I’ve also added custom substitutions with icons for common directories, such as ~/Code/, ~/Documents and ~/Downloads:
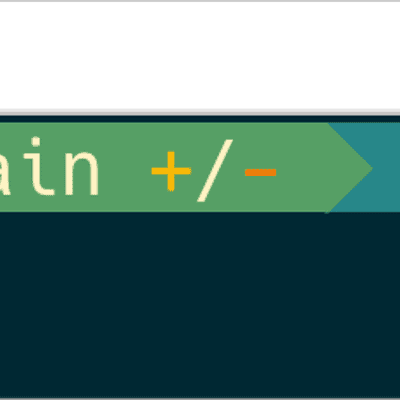
[git_metrics]disabled = falseformat = '[[+$added]($added_style)/[-$deleted]($deleted_style) ]'This is where things get interesting. The git segment shows four pieces of information:
- Branch name with an icon
- Git status showing staged/modified/untracked files
- Git state for operations like rebasing or merging
- Git metrics showing additions and deletions
The metrics feature is particularly useful—at a glance, I can see +7/-7 to understand the scope of my changes.
Language Environment Segment (Blue)
This segment automatically detects and displays icons for active programming environments:
The segment only appears when relevant files are detected in the current directory, keeping the prompt clean when you’re not in a project.
Right Side: Status Information
Using the $fill variable, I push status information to the right side of the terminal:
Time (Purple)
[time]disabled = falsetime_format = "%R"format = '[[ $time ]]'A simple 24-hour clock (e.g., 14:30). Some find this redundant, but I appreciate having timestamps in my terminal sessions.
Battery (Red background)
[battery]full_symbol = ""charging_symbol = ""discharging_symbol = ""Battery status with appropriate icons. The red background serves as a visual alert when I’m unplugged.
Command Duration (Aqua)
[cmd_duration]min_time = 2000format = '[[ $duration ]]'Shows execution time for commands that take longer than 2 seconds. This is invaluable for understanding which operations are slow and need optimization.
Exit Status (Yellow)
Displays an error indicator (✖) when the last command failed, along with the exit code.
Background Jobs (Orange)
Shows a icon with a count when there are background jobs running.
The Command Line
Finally, after all the context, comes the actual command line:
[character]success_symbol = '[](bold fg:color_bright_green)'error_symbol = '[](bold fg:color_bright_red)'A simple ❯ that turns red when the previous command failed. I’ve also configured vim mode indicators (since I use vi-mode in zsh):
- Normal mode (green)
- Replace mode (purple)
- Visual mode (yellow)
Performance Considerations
Starship is fast, but I’ve made a few tweaks to ensure it stays that way:
scan_timeout = 35command_timeout = 700The scan_timeout controls how long Starship spends looking for context (like git repos), while command_timeout limits how long individual modules can run. These values ensure the prompt never feels laggy.
Installation
Want to use this configuration? Here’s how:
Install Starship:
Terminal window brew install starshipInstall a Nerd Font: The icons require a Nerd Font. I use Hack Nerd Font Mono:
Terminal window brew tap homebrew/cask-fontsbrew install font-hack-nerd-fontConfigure your shell: Add to your
~/.zshrc:Terminal window eval "$(starship init zsh)"Edit your configuration: Find the configuration at
~/.config/starship.toml
Customization Tips
The beauty of Starship is how easy it is to customize. Here are some ideas:
- Minimize for remote sessions: Use different configs based on
$SSH_CONNECTION - Add custom modules: Starship supports custom commands and environment variables
- Theme variations: Try different palettes like Tokyo Night, Nord, or Dracula
- Context-aware layouts: Use different formats for different directories
Summary
Your terminal prompt is personal - it should reflect how you work and what information you need at a glance. My Starship configuration has evolved from when I was using PowerLine10k and will continue to be added to as time goes on.
The key is to start with something functional, then iterate. Pay attention to which information you actually use and which just becomes noise. A great prompt should feel invisible when you don’t need it and invaluable when you do.
You can find my current and full starship.toml configuration at the following link:
Share
Related Posts

Introducing ssl-toolkit
A comprehensive SSL/TLS diagnostic tool built in Rust that I created to replace my ever-growing document of random certificate checking notes.

OpenClaw: Giving Claude a Body (and a Telegram Bot)
A quick guide to installing OpenClaw, an open-source AI agent framework that gives LLMs persistence, tools, and messaging - turning a chatbot into an actual assistant.

Day to Day Tools, the 2025 edition
The 2025 edition of my day-to-day tools: Ghostty, Claude Code, Google's Antigravity IDE, and the AI services that have become central to how I work.

